Easy Origami Ancient Dragon: Step-by-Step Paper Craft
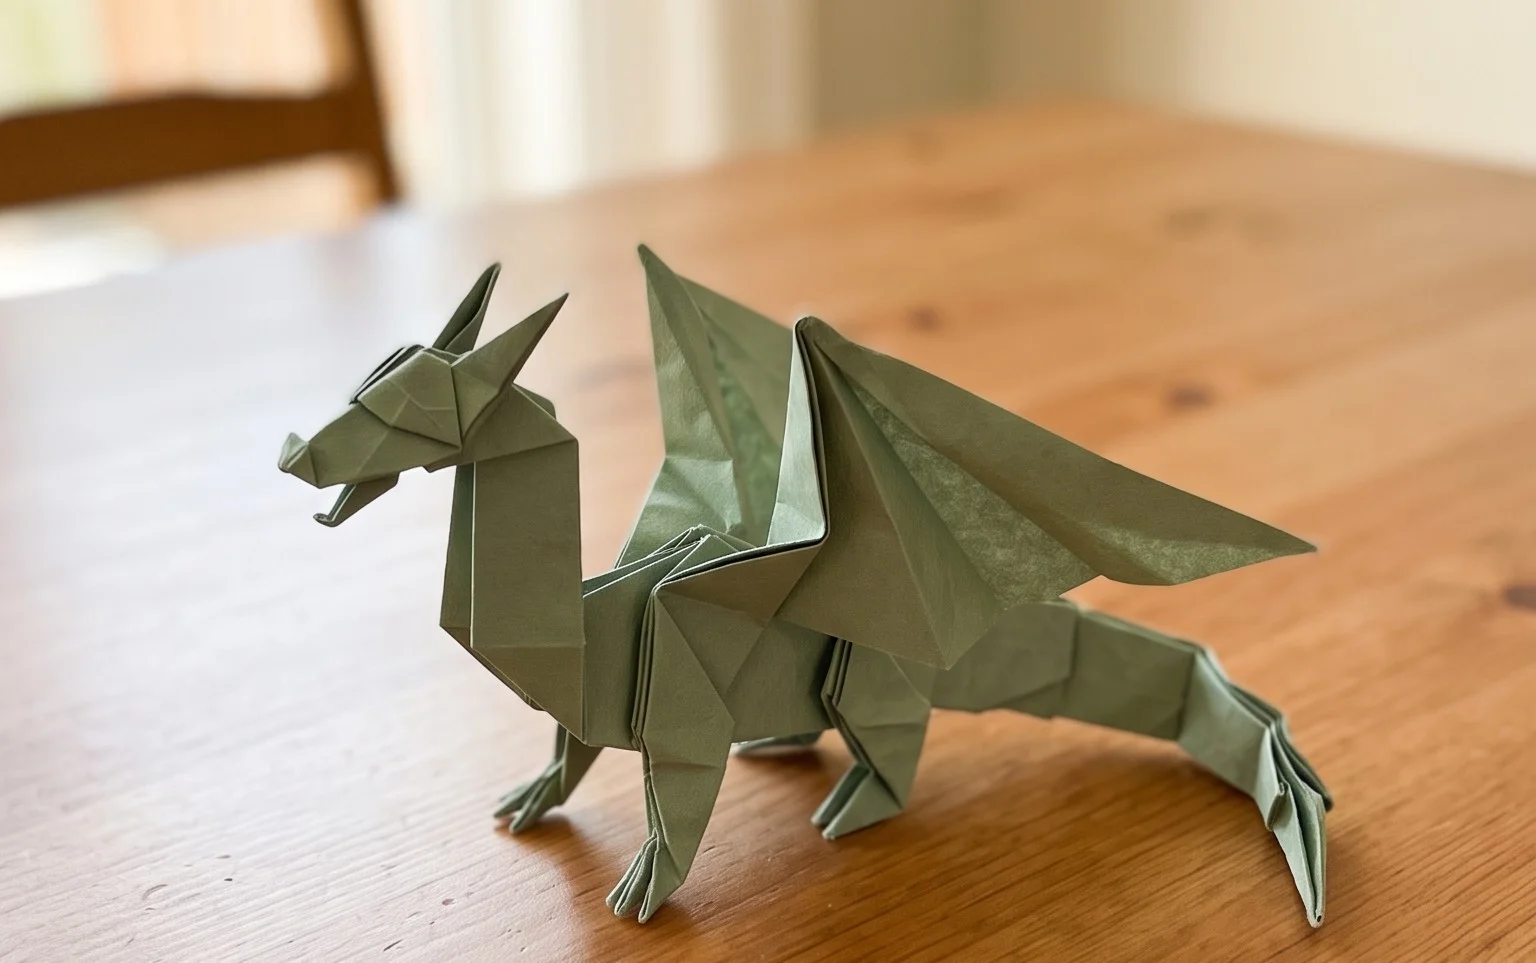
Ancient Dragon origami is a truly spectacular model to fold, and today, I’m so excited to guide you through creating your very own! Imagine a majestic creature unfurling before you – a powerful body, elegantly curved wings ready to take flight, and a detailed head hinting at ancient wisdom. This project is perfect for those who have mastered the very basics and are ready for a rewarding challenge; it might take you about 1-2 hours to complete, depending on your pace.
We’ll dive into techniques that create incredible dimension and form, learning how to shape scales, define the dragon’s serpentine body, and bring those impressive wings to life. Don’t worry if it seems a bit intricate at first; we’ll break it down step-by-step. Get your paper ready, and let’s begin this epic fold together!
Folding the Ancient Dragon: A Beginner’s Journey
Welcome, fellow paper-folding enthusiasts! Today, we’re going to embark on a fantastic journey to fold the Ancient Dragon. This model, while it sounds complex, is surprisingly achievable with a bit of patience and careful attention. It’s a rewarding fold that looks spectacular once completed. So, grab your paper, and let’s get started!
Choosing Your Paper: The Foundation of Your Dragon
Before we begin folding, let’s talk about the most crucial element: your paper. The right paper can make all the difference between a frustrating experience and a triumphant one.
For this Ancient Dragon, I highly recommend using origami paper. It’s specifically designed for folding – it’s thin enough to handle many layers without becoming too bulky, yet strong enough to hold creases.
* Type: Standard origami paper is perfect. Avoid thicker cardstock or construction paper, as they will be too difficult to fold precisely.
* Weight: Aim for a weight around 70-80 gsm (grams per square meter). This is a good balance of durability and foldability.
* Size: For your first attempt, I suggest starting with a square piece of paper that is at least 15cm x 15cm (6 inches x 6 inches). Larger sizes (20cm or 25cm) can be even easier for beginners as they give you more room to maneuver. Once you’re comfortable, you can experiment with smaller sizes.
* Single or Double-Sided: This is largely a matter of preference for this model. A single-sided paper will result in a dragon with a consistent color on both sides. A double-sided paper, where each side is a different color, can create some really interesting visual effects, especially for the wings and tail. If you have a patterned origami paper, this can also add a unique flair. For your very first dragon, I might lean towards a single-sided paper to focus on the folds themselves.
Ensure your paper is perfectly square. If you’re using paper that isn’t pre-cut into a square, measure and cut it carefully. A slightly imperfect square will lead to misaligned folds later on.
The Essential Base Folds: Building Blocks of Your Dragon
The Ancient Dragon is built upon a few fundamental origami bases. Mastering these will make the rest of the process much smoother.
The Square Base (or Preliminary Base)
This is one of the most common origami bases and forms the foundation for many models, including our dragon.
1. Start with your square piece of paper, white side up (if you have one).
2. Fold the paper in half horizontally, bringing the bottom edge up to meet the top edge. Crease firmly. Unfold.
3. Fold the paper in half vertically, bringing the left edge over to meet the right edge. Crease firmly. Unfold. You should now have a horizontal and a vertical crease, dividing your paper into four equal rectangles.
4. Now, flip the paper over so the colored side is facing up.
5. Fold the paper in half diagonally, bringing the bottom-left corner to meet the top-right corner. Crease firmly. Unfold.
6. Fold the paper in half diagonally again, bringing the bottom-right corner to meet the top-left corner. Crease firmly. Unfold. You should now have two diagonal creases forming an ‘X’ on your paper.
7. This is where it gets a little magical. Hold the paper with the diagonal creases facing upwards. Gently push the left and right edges inwards towards the center. As you do this, the top and bottom edges will naturally come together. Flatten the paper down. You should now have a smaller square with four flaps meeting at the bottom point. This is your Square Base. Make sure all your creases are sharp and clean.
The Kite Base
The Kite Base is often a stepping stone to other bases or directly used in models.
1. Start with a square piece of paper, colored side up.
2. Fold the bottom edge up to meet the top edge, and crease. Unfold.
3. Fold the left edge to meet the right edge, and crease. Unfold. You now have a horizontal and vertical crease.
4. With the paper still colored side up, fold the bottom-left edge inwards so it aligns perfectly with the vertical center crease. Crease firmly.
5. Repeat step 4 with the bottom-right edge, folding it inwards to meet the vertical center crease. Crease firmly. You should now have a shape that resembles a kite, with two triangular flaps meeting at the bottom point.
The Bird Base
The Bird Base is another incredibly common and important base in origami. It’s a more advanced step from the Square Base, and it’s crucial for many creature models.
1. Start with your Square Base, with the open end pointing towards you.
2. Take the top layer of the right flap and fold its bottom edge inwards to meet the center vertical crease. Crease firmly.
3. Repeat step 2 with the top layer of the left flap, folding its bottom edge inwards to meet the center vertical crease. Crease firmly. You should now have two small triangular flaps on top, with their bottom points meeting at the center.
4. Now, fold the entire top triangular section down over these two flaps. The point of this triangle should align with the bottom points of the flaps you just folded. Crease firmly.
5. Unfold the last three folds you made (the two side folds and the top triangle fold). You should see the crease lines.
6. Now, lift the very top layer of paper at the bottom point. As you lift it, use the creases you just made to peel the sides outwards. The paper should naturally open up and flatten into a diamond shape. This is called a petal fold. Smooth it down firmly.
7. Flip the entire model over.
8. Repeat steps 2 through 6 on this new side. You should end up with a diamond shape with two long, pointy “legs” at the bottom. This is your Bird Base.
Step-by-Step Folding: Bringing Your Dragon to Life
Now that we’ve covered our foundational bases, let’s begin folding the Ancient Dragon! We’ll be starting with the Bird Base.
1. Begin with your Bird Base, with the two separated points (legs) at the bottom. Ensure the closed point is at the top.
2. Take the top layer of the right “leg” and fold it upwards, aligning its edge with the center vertical crease. Crease firmly.
3. Repeat step 2 with the top layer of the left “leg,” folding it upwards to meet the center vertical crease. Crease firmly. You should now have two long, thin points extending upwards.
4. Flip the entire model over.
5. Repeat steps 2 and 3 on this side, folding the right and left “legs” upwards to meet the center vertical crease.
6. Now, turn the model so the two long points are facing upwards and the closed point is downwards.
7. Take the rightmost of the two upward-pointing flaps and fold it diagonally downwards, so its edge aligns with the outer edge of the model. Crease firmly.
8. Repeat step 7 with the leftmost of the two upward-pointing flaps, folding it diagonally downwards to align with the outer edge. Crease firmly. These will form the initial shape of your dragon’s wings.
9. Flip the model over and repeat steps 7 and 8 on this side to ensure both wings are symmetrical.
10. Turn the model so the two separated points are now at the top. These will become the head and tail.
11. Take the rightmost point and fold it downwards at an angle. The angle you choose will determine the posture of your dragon’s head and tail. Crease firmly.
12. Take the leftmost point and fold it downwards at a similar angle, mirroring the first fold. Crease firmly.
13. Now, we’re going to shape the head and tail. Look at the rightmost downward-pointing flap (which will be the head). Gently pull the very tip outwards and flatten it. This is an inside reverse fold. You’re essentially opening up the tip and folding it inside itself to create a smaller point. Crease firmly. This forms the dragon’s head.
14. Repeat step 13 on the leftmost downward-pointing flap to form the tail.
15. Now, let’s refine the wings. Take the right wing. Fold the outer edge downwards slightly, creating a more defined wing shape. Crease firmly. You can adjust this fold to give the wings more or less flair.
16. Repeat step 15 on the left wing, making sure it mirrors the right wing.
17. To make the dragon stand, you can slightly unfold the body at the bottom, creating a base. Gently spread the two sections at the bottom apart a little to allow it to rest on a flat surface.
Congratulations! You’ve just folded your Ancient Dragon. Take a moment to admire your work.
Common Pitfalls and How to Avoid Them
Even with clear instructions, it’s easy to stumble when learning a new origami model. Here are a few common areas where beginners tend to go wrong with this dragon, and how to steer clear of them:
* **Misaligned Creases in the Square Base:** This is by far the most common mistake. When making the initial horizontal, vertical, and diagonal folds, ensure that the edges and corners meet *exactly*. Even a millimeter off can propagate through the entire model, making subsequent folds difficult or impossible to align.
* How to Avoid: Be patient. Don’t rush the initial creasing. After each fold, check that the edges are perfectly aligned before creasing. Run your fingernail along the crease to make it sharp and precise.
* **Fumbling the Petal Fold in the Bird Base:** The petal fold, where you lift the bottom layer and use the creases to flatten it into a diamond, can be tricky. If your initial creases aren’t sharp, or if you try to force the paper, it can get bunched up and look messy.
* How to Avoid: Trust the creases! The creases you made in step 5 of the Bird Base are your guides. Gently lift the bottom point and let the creases do the work. Don’t try to pull the paper in directions it doesn’t want to go. Smooth it down with firm, even pressure.
* **Imprecise Head/Tail Reverse Folds:** The inside reverse folds to create the head and tail can be fiddly. If they’re not done cleanly, the head and tail can look a bit lopsided or unfinished.
* How to Avoid: Practice this fold slowly on a scrap piece of paper. For the actual dragon, gently open the tip of the flap you want to reverse fold. Push the point inwards, using the existing crease lines as your guide for where to fold. Flatten it carefully. It’s better to make a slightly less dramatic fold that is clean, than a dramatic one that is messy.
Varying Your Dragon: Unleash Your Creativity!
The beauty of origami is its versatility. Once you’ve mastered the basic Ancient Dragon, don’t hesitate to experiment!
* **Size:** As mentioned, start with larger paper and work your way down. Folding a tiny dragon from a 5cm square is a true test of dexterity!
* **Paper Pattern and Color:** This is where you can really make your dragon unique.
* Patterned paper: Many origami papers have beautiful patterns. Think about how the pattern will look on the wings, body, or tail.
* Color combinations: Use double-sided paper with contrasting colors to highlight different parts of the dragon. For example, a red dragon with black wings can look very striking.
* Metallic or iridescent papers: These can give your dragon a magical, ancient feel.
* **Adjusting Folds:** You can subtly alter the angle of the head and tail folds to give your dragon different expressions or poses. You can also make the wing folds more or less pronounced.
Displaying and Gifting Your Ancient Dragon
Your completed Ancient Dragon is a work of art! Here are some ideas for showcasing your creation or sharing it with others.
* **Display:**
* On a shelf or mantelpiece: Its intricate form makes it a striking decorative piece.
* As part of a diorama: Imagine your dragon perched on a small mountain of crumpled brown paper or nestled among some greenery.
* In a shadow box: Frame your dragon for a truly elegant display.
* As a bookend: For a slightly larger dragon, it can add a whimsical touch to your bookshelf.
* **Gifting:**
* As a thoughtful gift: A handmade origami dragon is a unique and personal present for friends, family, or anyone who appreciates a bit of magic.
* For special occasions: It can be a wonderful gift for birthdays, holidays, or even as a good luck charm.
* As part of a larger gift: Tuck a small origami dragon into a card or alongside another present.
Folding the Ancient Dragon is a rewarding experience that hones your precision and patience. With each fold, you’re not just creating a paper sculpture, you’re bringing a mythical creature to life. Enjoy the process, and happy folding!
Conclusion
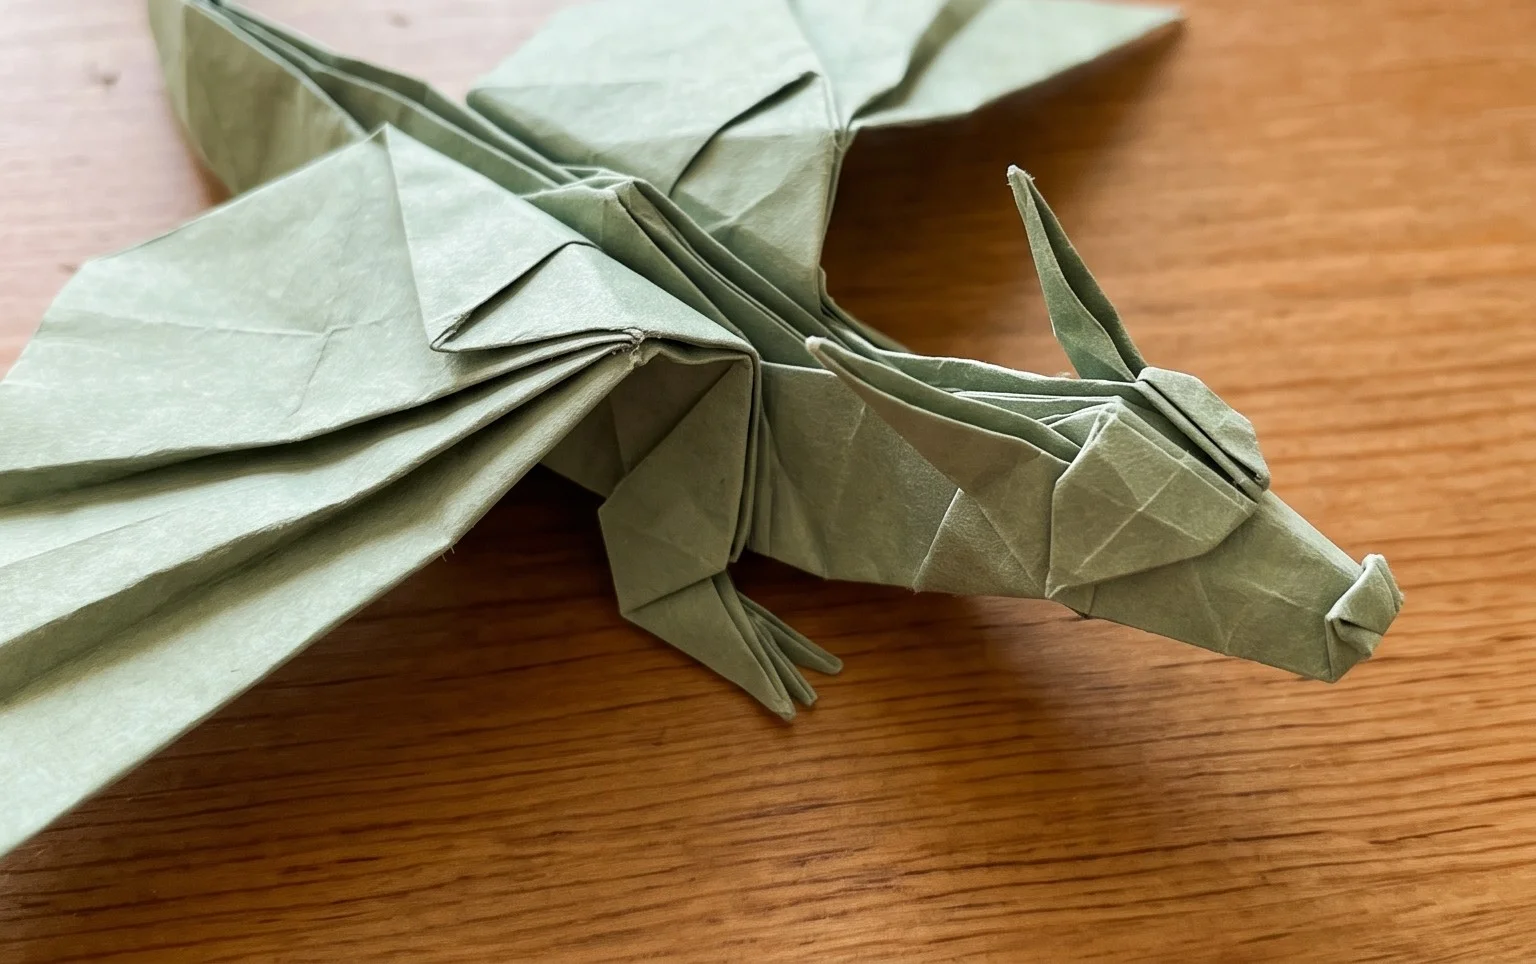
You’ve folded an Ancient Dragon! Take a moment to admire your creation. Don’t worry if your first attempt isn’t perfect; every fold is a learning experience. The beauty of origami is in the journey, and practice will make your future dragons even more majestic.
We’d love to see your finished Ancient Dragon! Share your masterpiece with us. Ready for more adventures? Try folding a different mythical creature next, perhaps a Griffin or a Phoenix. There’s a whole world of fascinating paper projects waiting for you to discover!