Easy Origami Forest Animals Cootie Catchers for Kids
Forest Animals Cootie Catchers are about to bring a whole lot of fun to your craft time! Imagine a vibrant little fortune teller, but instead of just colors, you’ll be flipping open to reveal adorable woodland creatures like a sly fox, a sleepy bear, or a cheerful rabbit. These are absolutely perfect for little hands and complete beginners, making them ideal for kids who love to create. They’re also a fantastic, quick activity for playdates or even as a cute, handmade gift!
In just about 15-20 minutes, you’ll learn the simple folds to transform a plain piece of paper into these delightful, interactive toys. Get ready to discover how easy it is to make your own forest friends and then have a blast playing the classic cootie catcher game with them. Let’s get folding!
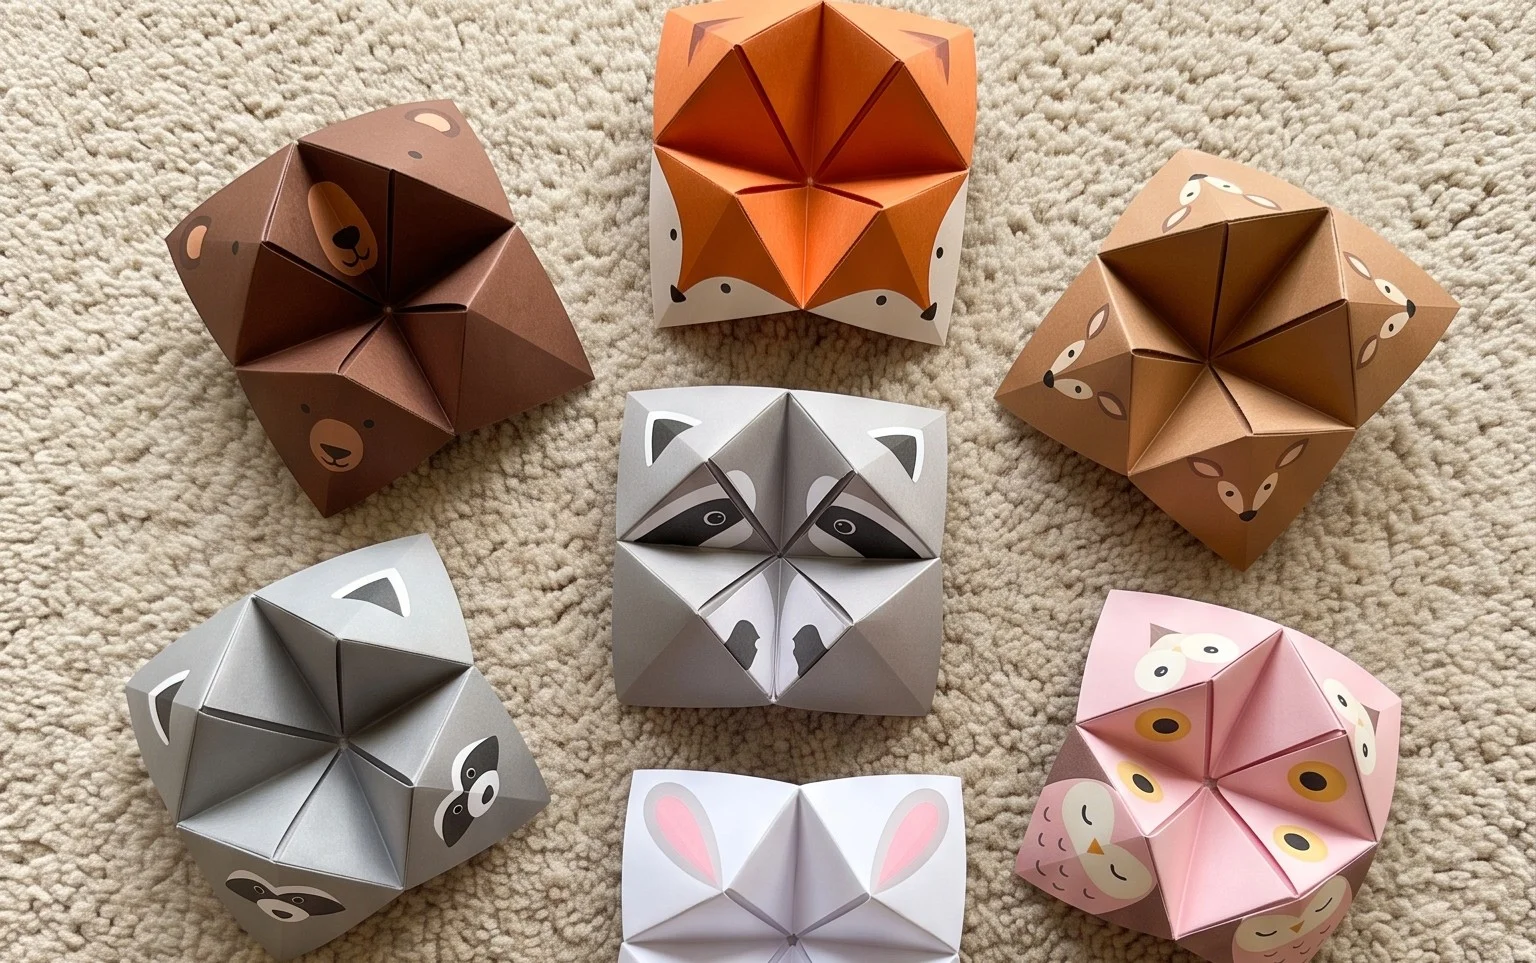
Forest Animals Cootie Catchers – Origami for Kids – Easy Peasy and Fun
Hello there, budding origami artists! Today, we’re going to embark on a wonderfully fun and easy origami adventure to create some adorable forest animal cootie catchers. These aren’t just any cootie catchers; they’re a delightful way to bring the magic of the forest right into your hands. Get ready for some easy peasy folding and loads of fun!
Choosing Your Paper: The Foundation of Fun
The paper you choose can really make your cootie catcher special! For these forest friends, I recommend using standard origami paper.
- Type: Origami paper is ideal because it’s specifically designed for folding – it’s thin enough to make multiple folds without getting too bulky, yet strong enough to hold crisp creases. If you don’t have origami paper, any thin, plain printer paper will work too.
- Weight: Standard origami paper is usually around 60-80 gsm (grams per square meter). This is perfect for cootie catchers. Avoid cardstock or construction paper as they are too thick and will make the final model difficult to manipulate.
- Size: A 6-inch by 6-inch (15cm x 15cm) square is the most common and a fantastic size for beginners. It’s big enough to easily fold and write on, but not so large that it becomes unwieldy. You can certainly experiment with larger squares if you want to draw more intricate animal faces!
- Single or Double-Sided: This is where you can get creative! For a classic look, use single-sided origami paper. The plain white side can be used for drawing your animal faces and designs later on. If you want a pop of colour inside your cootie catcher, or if you’re feeling extra adventurous with your designs, double-sided paper can be fun too. I love using paper with a wood grain pattern or a leafy design on one side and a solid, earthy colour on the other for that perfect forest feel.
Before you start folding, make sure your paper is a perfect square. If you’re using printer paper, you’ll need to turn it into a square. Take one corner and fold it diagonally across to meet the opposite edge, creating a triangle. The excess rectangle at the bottom can be carefully cut off or folded back and forth until it tears cleanly.
The Base Folds: Building Our Forest Friends
We’re going to start with a couple of fundamental folds that are the building blocks of most origami models, including our cootie catcher. Taking your time with these initial folds will make the rest of the process much smoother.
The Square Base Fold
This is the first step to creating the structure of our cootie catcher.
- Starting Point: Place your square piece of paper on a flat surface with the coloured or patterned side facing up. If you have single-sided paper, the side you want to be visible on the outside of your cootie catcher should be facing up.
- First Diagonal Fold: Take the bottom right corner and fold it upwards to meet the top left corner. You should now have a triangle. Run your fingernail along the crease to make it nice and sharp.
- Unfold: Open the paper back up so it’s a flat square again. You should see a diagonal crease running from corner to corner.
- Second Diagonal Fold: Now, take the bottom left corner and fold it upwards to meet the top right corner. Again, press down firmly along the crease.
- Unfold: Open the paper back up. You should now have two diagonal creases forming an ‘X’ across your square.
- Valley Fold to the Center: We’re going to bring all four corners into the centre. Take the bottom edge of the paper and fold it upwards so that it meets the centre point where your two diagonal creases intersect. Press down to make a sharp crease.
- Repeat for All Sides: Now, rotate your paper so the next edge is at the bottom. Fold that bottom edge up to meet the centre point. Continue this for all four sides. You should now have a smaller square, with all the corners meeting at the centre. It will look like a smaller, layered square.
Flipping and Folding for the Pocket
Now we’ll flip it over and create the pockets that make the cootie catcher work.
- Flip It Over: Turn the entire folded square over. The side that was facing down is now facing up.
- Another Set of Folds to the Center: Just like before, we’re going to bring the edges to the centre, but this time the side facing up will be the inside of our cootie catcher. Take the bottom edge and fold it up to meet the centre point. Crease firmly.
- Continue for All Sides: Rotate the paper and repeat for the other three sides. Fold the bottom edge to the centre, crease, and continue until all four edges are folded in towards the centre. You’ll have another smaller square, with a much smoother surface on this side.
- The Final Fold: Now, take the entire square and fold it in half, bringing the bottom edge up to meet the top edge. You should have a rectangle. Make a firm crease.
- Fold in Half Again: Keeping it folded, fold the rectangle in half again, bringing the left edge over to meet the right edge. You’ll have a smaller square with four flaps.
The Fold Sequence: Bringing Our Forest Animals to Life
Here’s where we assemble our cootie catcher. We’ll be using those triangular pockets we created.
- Preparing the Pockets: Look at the square you have with the four flaps. Gently slide your fingers into the four large triangular pockets on the corners. This will help you see where the magic happens.
- Forming the Cootie Catcher: With your fingers inside the pockets, gently push the sides inwards. The folds you made in the previous steps will naturally guide the paper. Bring the four corners together, and you should see the cootie catcher start to take shape. The four coloured squares on the outside will be the “choices” you make when playing.
- Creating the Cups: Once you have the basic shape, gently flatten the bottom so it sits nicely. The four smaller triangular flaps on the bottom are where you will insert your fingers. Two fingers go into one side, and two go into the other.
- Testing the Movement: Gently pinch the top of the cootie catcher with one hand and use your other hand to slide your fingers into the pockets and move them. The cootie catcher should open and close smoothly.
Common Pitfalls and How to Avoid Them
Don’t worry if your first attempt isn’t perfect! Every origami artist has been there. Here are a couple of places beginners often find tricky:
- Messy Creases: This is probably the most common issue. When you make a fold, use your fingernail or a bone folder to press down firmly along the entire length of the crease. This makes the paper hold its shape better and makes subsequent folds much easier and neater. If your creases are soft, the cootie catcher can end up looking floppy and be hard to move. To avoid: Be generous with your creasing!
- Misaligned Corners/Edges: When you’re folding the corners to the centre, make sure they meet precisely at the centre point. If they don’t quite meet, or if they overlap too much, your final cootie catcher might be a bit lopsided. To avoid: Take your time and visually check that the corner or edge is perfectly aligned before you make the crease. Don’t rush through these steps.
- Forgetting to Flip: In the steps where we flip the paper over, it’s crucial to do so. If you forget to flip at the right stage, the layers will be in the wrong place, and your cootie catcher won’t open properly. To avoid: Read each step carefully, and if it says “flip,” make sure you actually flip it!
Varying Your Forest Friends
Once you’ve mastered the basic folds, the fun really begins with customization!
- Size: As mentioned, starting with a 6-inch square is great. If you want a giant cootie catcher, use a 12-inch square. For tiny, portable ones, try 4-inch squares. Just remember that smaller sizes will require more delicate folding.
- Paper Pattern: This is where your forest theme comes alive! Use paper with trees, leaves, animal prints, or even solid colours that remind you of the forest floor, bark, or sky. You can even find papers with a subtle texture that mimics natural materials.
- Colour: Don’t be afraid to mix and match! Use green and brown for trees and earth, blue for the sky, and splashes of red or orange for berries or autumn leaves. You can even use one colour for the outside of the cootie catcher and a different, contrasting colour for the inside to make your animal drawings stand out.
Bringing Your Forest Animals to Life
Now for the best part – decorating your cootie catcher to become a woodland creature!
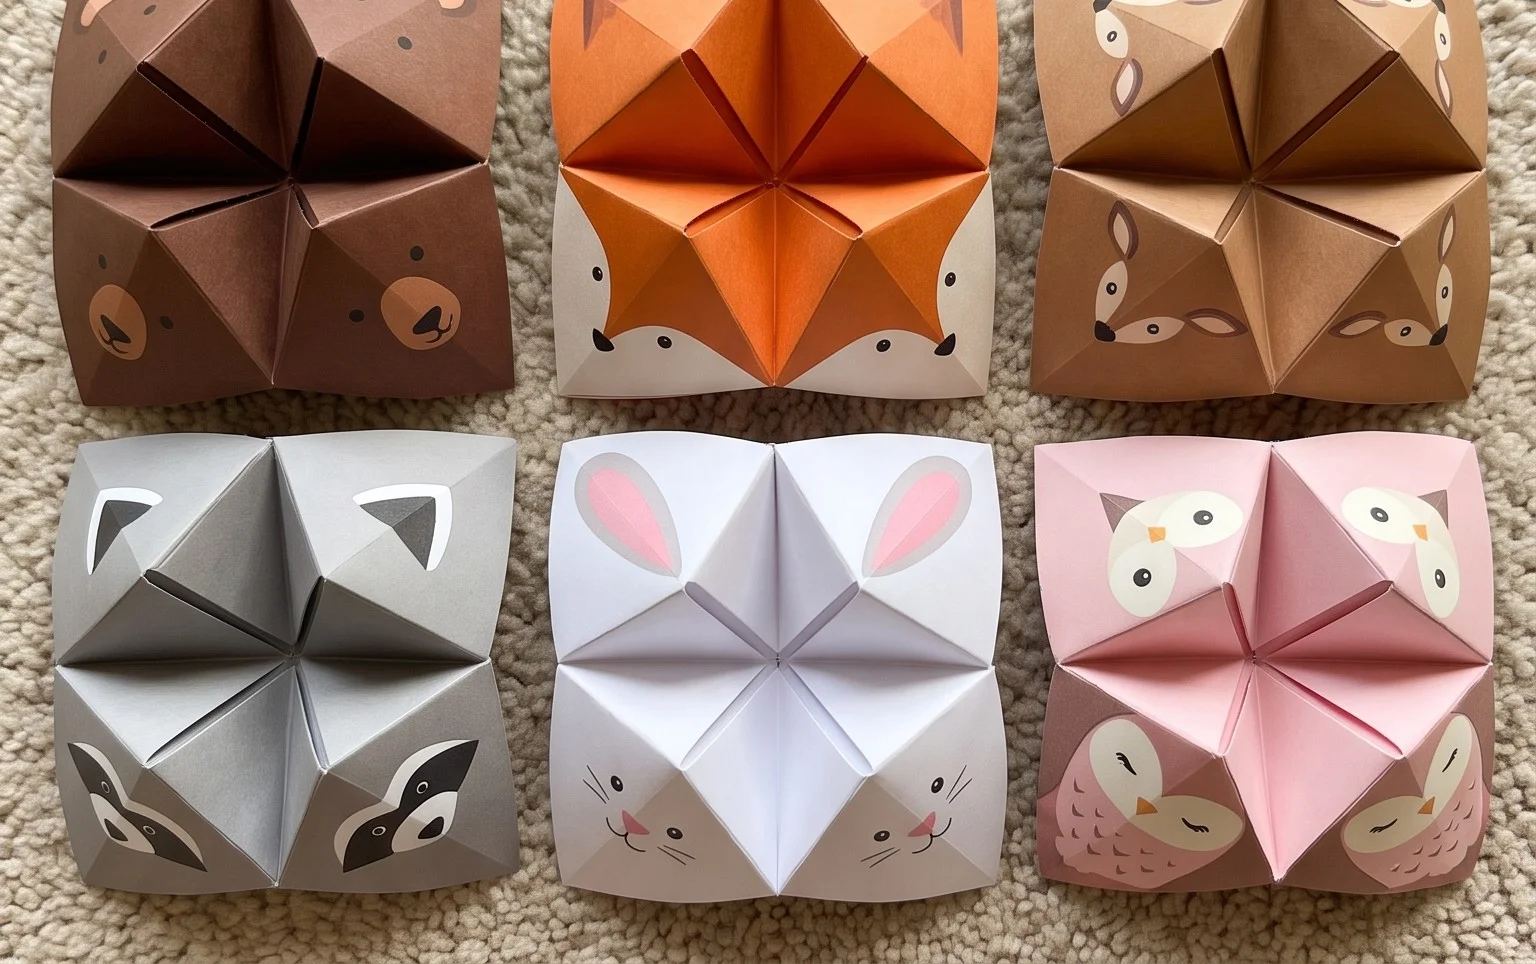
- The Outside: On each of the four outside squares, draw a part of your forest animal. You can draw eyes, a nose, ears, or even a whole face! Think about a cute owl, a sly fox, a busy squirrel, or a curious deer.
- The Inside: When you open the cootie catcher, you’ll find four inner flaps. On these, you can write numbers or simple prompts. If you’re making a specific animal, you could write things like “Hoot!” for an owl, “Chirp!” for a bird, or “Scurry!” for a squirrel.
- More Options: On the very inside when you open it fully, you can write messages or dares, just like a traditional cootie catcher. “Tell a joke,” “Hop like a bunny,” or “Sing like a bird” are all fun ideas.
Displaying or Gifting Your Forest Friends
Your completed forest animal cootie catchers are too special to just leave lying around!
- Gifting: These make fantastic, handmade gifts for friends, siblings, or cousins. Tuck them into a birthday card, a party favour bag, or just give them as a sweet surprise. You can even bundle a few different animal cootie catchers together for a forest-themed gift set.
- Display: You can thread a thin ribbon or string through the centre hole (if you choose to make one by carefully poking it through the very centre layers) and hang them from a mobile, a branch, or even a Christmas tree. They also look lovely lined up on a shelf as a colourful reminder of your crafting prowess.
- Storytelling Props: Use them as props for telling forest-themed stories. Each cootie catcher can represent a different animal or a different part of the story, adding an interactive element for younger children.
I hope you’ve had as much fun folding these as I do! They’re simple, engaging, and a wonderful way to spark creativity. Happy folding, and may your forest adventures be filled with joy!
Conclusion
Congratulations! You’ve just created your very own forest animals cootie catcher. We hope you had as much fun making it as we did designing it. Don’t worry if your first attempt wasn’t perfect – origami is all about practice, and each fold gets you closer to a masterpiece. Now that your adorable forest animals are ready, why not share them with your friends and family? They’ll be amazed at your paper-folding skills!
Looking for a new challenge? Try making our Animal Puppets next, or perhaps the Origami Dog Box for a different kind of fun. There are so many wonderful paper projects waiting for you to explore. Keep folding and keep creating!
