Easy Origami Bat: Step Halloween Paper Craft
Origami Bat: Easy Halloween Paper Tutorial is here to help you craft your very own spooky friend! Imagine a delightful, little bat, its wings poised for flight, with pointy ears and a friendly face. This charming creation is absolutely perfect for complete beginners and kids alike, making it a fantastic activity for a rainy afternoon or a fun Halloween party craft. In just about 10-15 minutes, you’ll learn the basic folds to bring this paper creature to life.
Get ready to discover how simple it is to transform a flat sheet of paper into a whimsical Halloween decoration or a cute little gift. We’ll guide you through each of the 8 easy steps, ensuring you can make your own adorable origami bat in no time. Let’s get folding and add a touch of magic to your Halloween!
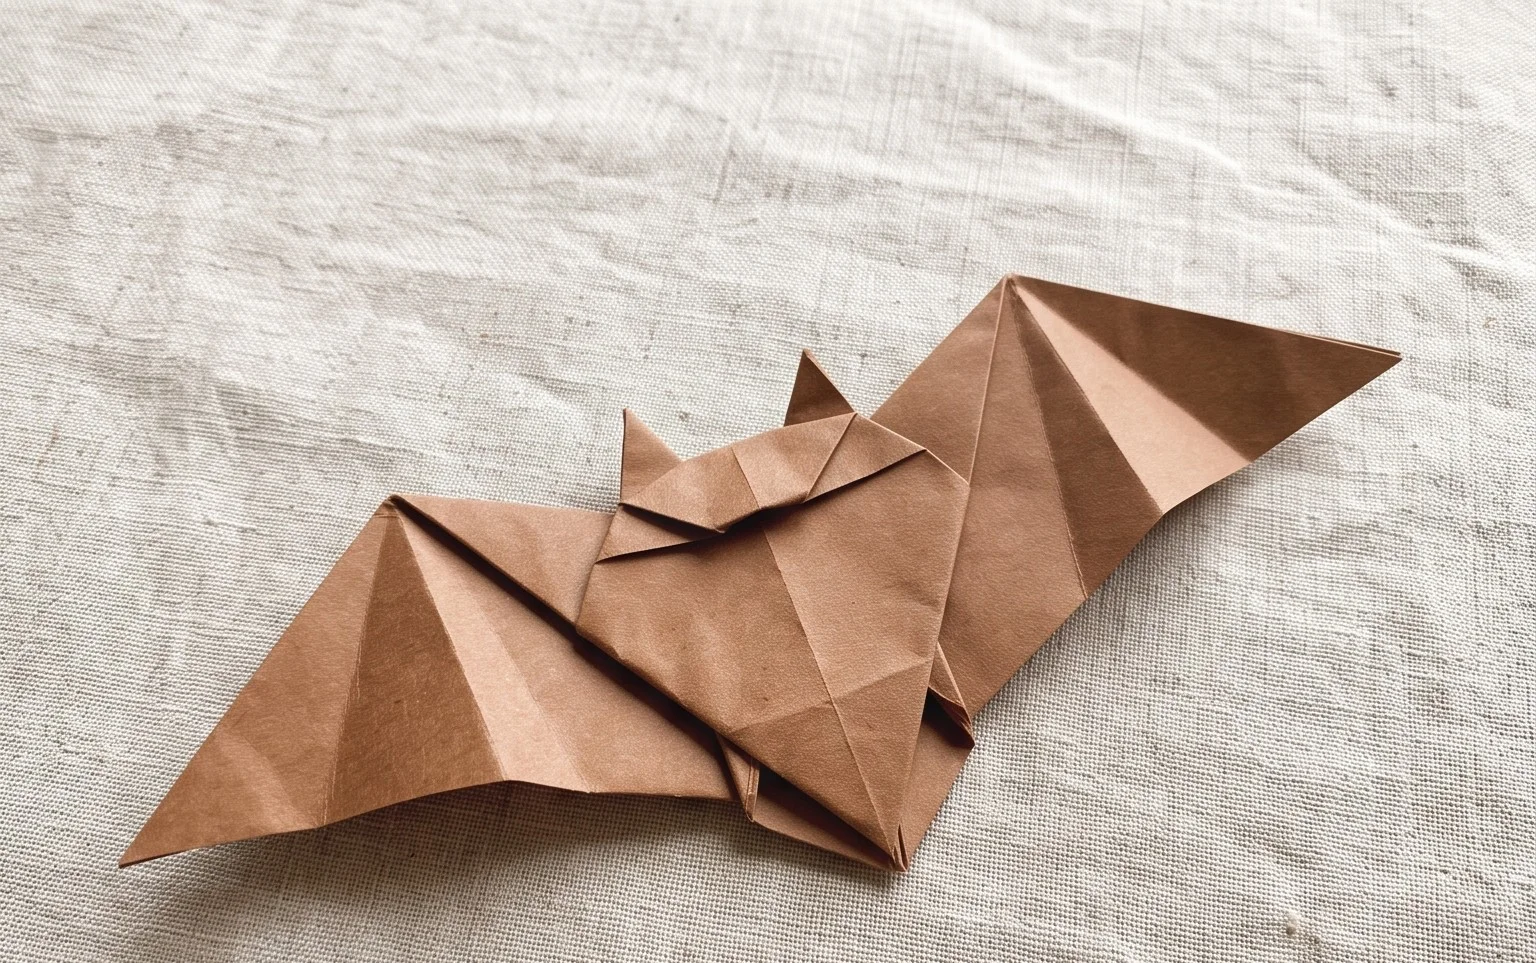
Origami Bat: Easy Halloween Paper Tutorial In 8 Steps
Hey there, fellow paper enthusiasts! As the spooky season approaches, there’s no better time to get crafty and create some delightful decorations. Today, we’re going to dive into the wonderfully simple world of origami to craft an adorable bat. This project is perfect for beginners and will add a fantastic handmade touch to your Halloween decor. We’ll break it down into just eight easy steps, and I’ll be here to guide you through each fold, making sure you get a fantastic result.
Choosing Your Paper: The Foundation of a Fantastic Bat
Before we start folding, let’s talk about the star of our show: the paper. For this origami bat, you don’t need anything too fancy, but the right paper can make a difference.
- Type: Standard origami paper is ideal. It’s thin enough to fold easily without becoming too bulky, yet strong enough to hold its shape. If you don’t have origami paper, regular printer paper will work, but it might be a little stiffer to fold.
- Weight: Origami paper typically weighs around 70-80 gsm (grams per square meter). This is a good weight for most origami models, including our bat. If you’re using printer paper, aim for something around 80 gsm.
- Size: A good starting size for this bat is a 6-inch by 6-inch (15cm x 15cm) square. This size is manageable for beginners and produces a bat that’s noticeable but not too large. You can always experiment with larger or smaller sizes once you’ve mastered the basic folds.
- Single or Double-Sided: For this bat, you have a couple of great options.
- Single-sided paper: If you use paper that’s colored on one side and white on the other, your bat will have a lovely contrast. The colored side will be the exterior of your bat, and the white side will show through on the inside of the wings. This is often how traditional origami paper is made, and it looks very effective.
- Double-sided paper: You can also use paper that is colored on both sides, or even patterned on both sides. This will give your bat a bolder, more uniform look. For a Halloween theme, black or dark purple on both sides is classic, but don’t be afraid to get creative with orange, yellow, or even spooky patterns!
For this tutorial, I recommend starting with a standard 6-inch square of single-sided black origami paper. This will give you a classic bat look, and the white interior of the wings will be a nice subtle detail. Just make sure your square is as perfectly square as possible – precision at this stage makes all the difference!
The Base Folds: Building Blocks of Our Bat
Origami relies on a few fundamental folds that we’ll use to build our bat. Let’s get comfortable with them.
- Valley Fold: Imagine you’re folding a piece of paper in half to create a ‘V’ shape. The crease you make is a valley fold. To make them cleanly, always align your edges and corners precisely. Once aligned, run your fingernail or a bone folder along the crease firmly from one end to the other.
- Mountain Fold: This is the opposite of a valley fold. Imagine you’ve folded the paper and then unfolded it, so the crease pops outwards like a mountain peak. Again, precision in alignment is key.
- Squash Fold: This is a bit more dynamic. You’ll typically start with a flap that is open on one side. You’ll then push down on the top point, flattening the flap outwards and inwards simultaneously. It’s like opening a book but pushing the pages flat from the top. We’ll tackle this one as we go.
Don’t worry if these sound a little abstract right now. We’ll practice them as we fold our bat. The most important thing is to take your time and make each crease sharp and precise. This will make the subsequent steps much easier and your final bat much neater.
Your 8-Step Origami Bat Journey
Alright, let’s get folding! I’ll assume you have your 6-inch square of origami paper in front of you. If you’re using single-sided paper, start with the colored side facing up.
- Step 1: The Initial Crease. Take your square paper and fold it in half diagonally, bringing the bottom right corner up to meet the top left corner. Make a nice, sharp crease. Then, unfold the paper. You should now have a diagonal crease running across your square. Now, fold the paper in half diagonally again, this time bringing the bottom left corner up to meet the top right corner. Crease it well, and then unfold. You should now have two diagonal creases that cross in the center, forming an ‘X’ shape on your paper.
- Step 2: Creating the Waterbomb Base. This step sets up a common origami base. With the colored side still facing up (if you’re using single-sided paper), bring the left edge of the paper over to meet the right edge, and make a vertical crease down the middle. Unfold. Now, flip the paper over so the white side is facing up. Take the bottom edge and bring it up to meet the top edge, making a horizontal crease. Unfold. You should now have a horizontal and a vertical crease, intersecting at the center. Now, gently push the left and right sides inwards along the vertical crease. As you do this, the top part of the paper will naturally start to collapse downwards along the existing diagonal creases. Bring the top point down to meet the bottom point, and flatten the whole thing into a square. This is called a waterbomb base. Your paper should now be a smaller square with four flaps meeting at the bottom point.
- Step 3: Shaping the Wings. Make sure the open end of your waterbomb base is pointing downwards towards you. Take the top layer’s right flap and fold its bottom edge inwards so it aligns with the center vertical crease. Crease it well. Do the same with the top layer’s left flap, folding its bottom edge inwards to meet the center vertical crease. You should now have a kite shape on the top layer.
- Step 4: The First Wing Fold. Now, take the entire right side of the kite shape you just created (this is the flap you folded in step 3) and fold it outwards. The crease you make should be parallel to the original vertical center crease, and you’re essentially opening up that flap you just folded. This will form one of the bat’s wings.
- Step 5: Mirroring the Wings. Repeat steps 3 and 4 on the left side of your paper. First, take the top layer’s left flap and fold its bottom edge inwards to align with the center vertical crease. Then, take the entire left side of the kite shape and fold it outwards, parallel to the center crease, to form the other wing. You should now have a shape that’s starting to look like the outline of a bat, with two wings spread out.
- Step 6: The Head and Body. Look at the top point of your paper – this will become the bat’s head. Gently fold this point down. You can fold it down a little bit or a lot, depending on how prominent you want the head to be. A small fold will give a more subtle head. Now, turn the entire model over.
- Step 7: Refining the Body. You should see a triangular section at the top of the back of your model. Take the point of this triangle and fold it downwards, just enough to create the distinct body shape of the bat. This fold helps to give the bat some depth.
- Step 8: Adding the Final Touches. This is where your bat truly comes to life! You can now fold the tips of the wings slightly upwards to give them a more natural, curved shape. You can also make tiny folds at the very top of the head to suggest ears, or even fold the point of the head down further if you want a more rounded head. Experiment with these small adjustments to give your bat personality. And there you have it – your very own origami bat!
Common Pitfalls and How to Avoid Them
Even with simple models, it’s common for beginners to run into a few snags. Here are some places where people often go wrong with this bat, and how to keep your folding smooth:
- Misaligned Creases: This is the most frequent culprit. If your initial diagonal and horizontal/vertical creases aren’t perfectly aligned, your waterbomb base (Step 2) might not form neatly, and subsequent folds will be off.
- How to Avoid: Be meticulous in Step 1. Ensure corners meet exactly and edges are flush before creasing. For Step 2, take your time. Gently guide the paper; don’t force it. If it feels wrong, gently unfold and try again, paying close attention to how the existing creases are guiding the paper.
- Forcing the Folds in Step 3 & 4: When you fold the flaps in to meet the center and then fold them back out, if the paper is too thick or the previous folds weren’t sharp enough, it can feel stiff.
- How to Avoid: Use thin paper if possible. Ensure your initial creases are firm and sharp. For Step 3, make sure you’re only folding the *top layer* of the flap. In Step 4, when you fold the wing out, align it precisely with the edge of the flap you just folded in Step 3. This creates a clean, parallel fold.
- Overly Large or Small Head/Body Folds (Step 6 & 7): It’s easy to make these folds too big or too small, which can throw off the bat’s proportions.
- How to Avoid: Start with small, tentative folds. You can always unfold and adjust. Look at the overall shape as you’re folding. If you fold the head down too much, it can make the bat look squat. Similarly, if you fold the body crease too low, it might look unbalanced. Aim for subtle, elegant adjustments rather than drastic ones.
Remember, practice makes perfect! Don’t get discouraged if your first bat isn’t flawless. Each fold you make helps you understand the paper better, and your origami skills will improve with every model you create.
Varying Your Origami Bat: Get Creative!
Once you’ve mastered the basic steps, the fun really begins! Here are some ways to make your origami bats unique:
- Size: Use larger squares of paper for bigger bats, or smaller squares for a whole colony of tiny bats. Larger paper might require a bit more pressure to crease, while smaller paper needs extra precision.
- Paper Pattern and Color: The possibilities are endless!
- Halloween Colors: Black, orange, purple, and yellow are obvious choices.
- Spooky Patterns: Look for papers with ghost, pumpkin, cobweb, or witch hat patterns.
- Metallic or Glitter Paper: For a more magical, mystical feel.
- Textured Paper: Papers with a slight texture can add an interesting tactile element.
- Glow-in-the-Dark Paper: Imagine the effect of these in a dimly lit room!
- Adding Details:
- Eyes: Use a fine-tip marker to draw on eyes. White dots on black paper can look very effective, or use googly eyes for a playful touch.
- Sharp Teeth: A tiny zig-zag fold at the bottom of the head can suggest fangs.
- Wing Cuffs: You can fold the very edges of the wings inward slightly for a more defined shape.
Don’t be afraid to experiment. The beauty of origami is that you can always unfold and try again, or simply make another one with your new ideas!
Displaying and Gifting Your Bat Creations
Finished bats are not just decorations; they’re also wonderful little gifts!
- Decorations:
- Hanging: Punch a small hole at the top of the bat’s head and thread a piece of clear fishing line or thin thread through it. You can then hang them from ceilings, windows, or even branches to create a spooky mobile.
- Table Scatter: Place them around your Halloween party table, on mantels, or bookshelves for a festive touch.
- Garlands: String several bats together with glue or small clips to create a unique Halloween garland.
- On Cards: Glue a small bat onto a handmade Halloween card for an extra special greeting.
- Gifts:
- Party Favors: Hand them out to guests at your Halloween party.
- Small Gifts: Tuck one into a lunchbox for a surprise treat.
- Crafting Companion: Gift them to friends or family who enjoy crafting, along with a piece of special paper for them to make their own.
I hope you’ve enjoyed making your origami bats! They are such a fun and easy way to bring some festive cheer into your home. Happy folding, and have a wonderfully spooky Halloween!
Conclusion
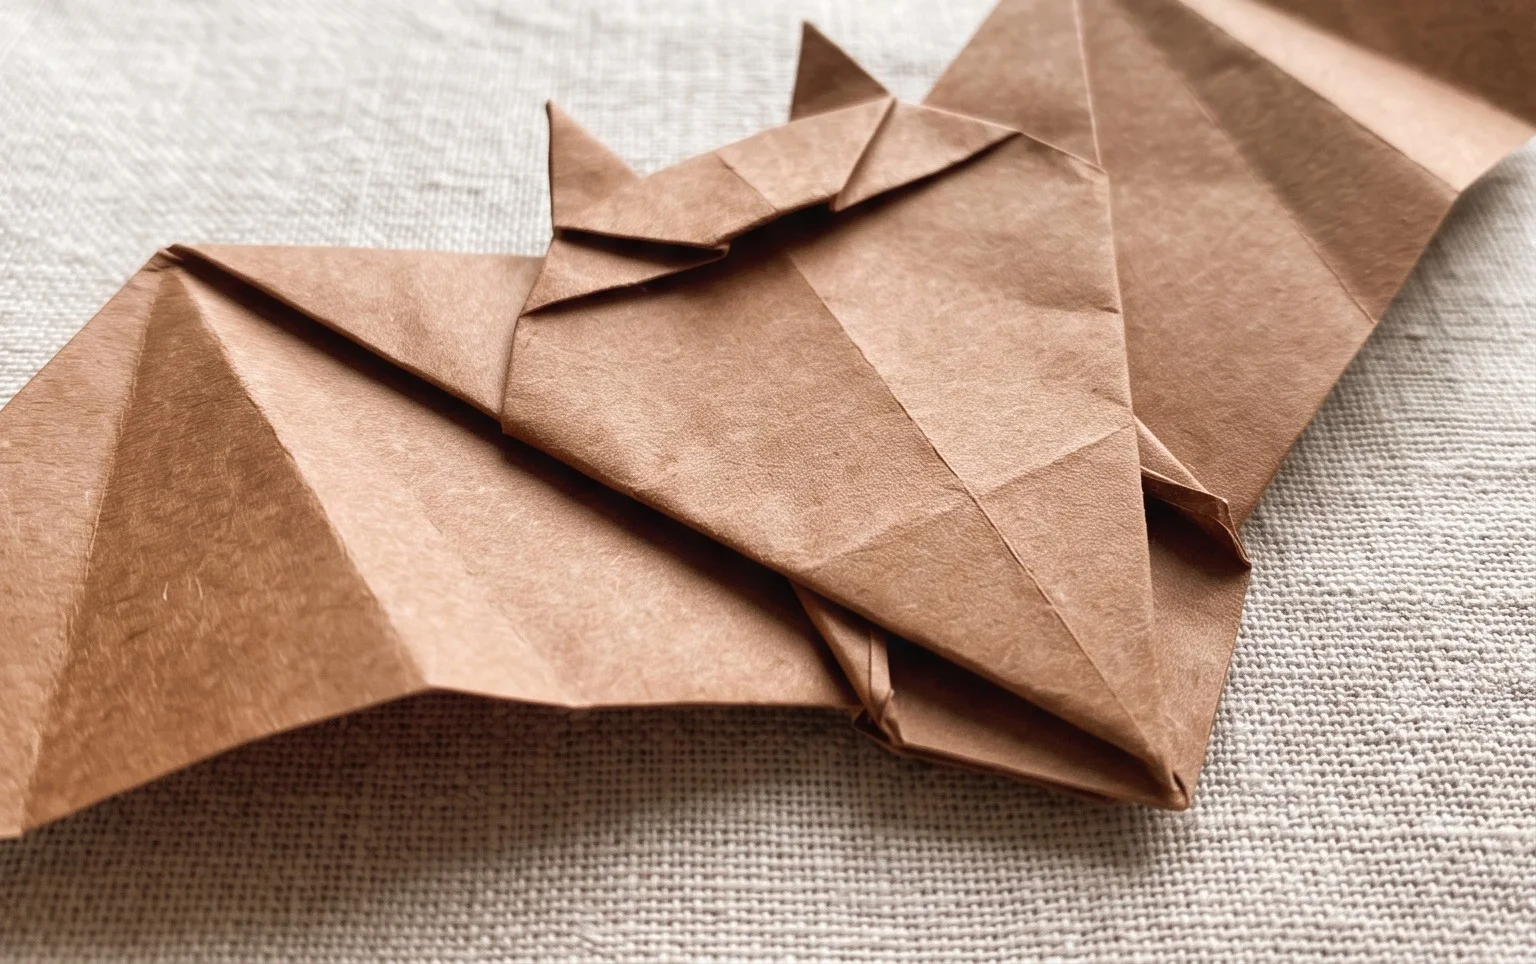
Congratulations on folding your very own origami bat! We hope you had a spooktacular time creating this easy Halloween paper craft. Don’t worry if your first attempt isn’t perfect; every fold is a step towards mastery, and practice makes your bat even more impressive. We’d love to see your finished creations – feel free to share them with friends and family!
Ready for more festive fun? Why not try folding a spooky ghost or a mischievous spider next? There are so many delightful paper projects waiting for you to explore. Happy folding!
